- Published 7 May 2025
- Last Modified 7 May 2025
- 11 min
Professional’s Guide: How to Remove Broken Screws and Broken Heads
Wondering how to remove a broken screw? Learn how to get a broken screw out without damaging the material with these removal techniques and tips.

Encountering a broken screw during a project can be frustrating, especially for professionals who need to maintain the integrity of their workpieces. Whether dealing with stripped heads, snapped screws, or rusted-in screws, improper broken screw removal techniques can lead to further damage, complicating repairs and potentially compromising the entire project.
This guide provides professionals with the knowledge and techniques necessary to effectively facilitate broken screw removal in various materials, ensuring efficient and damage-free extraction. We'll explore how to get a broken screw out with minimal fuss, and how to unscrew a broken screw while preserving the surrounding material.
Understanding the Different Types of Broken Screw
Before attempting to remove a broken screw, it's essential to accurately diagnose the type of screw failure you're facing. Applying the wrong extraction method can exacerbate the problem, leading to further damage to the workpiece. A careful assessment will guide you towards the most effective and least invasive solution.
Stripped Screw Heads
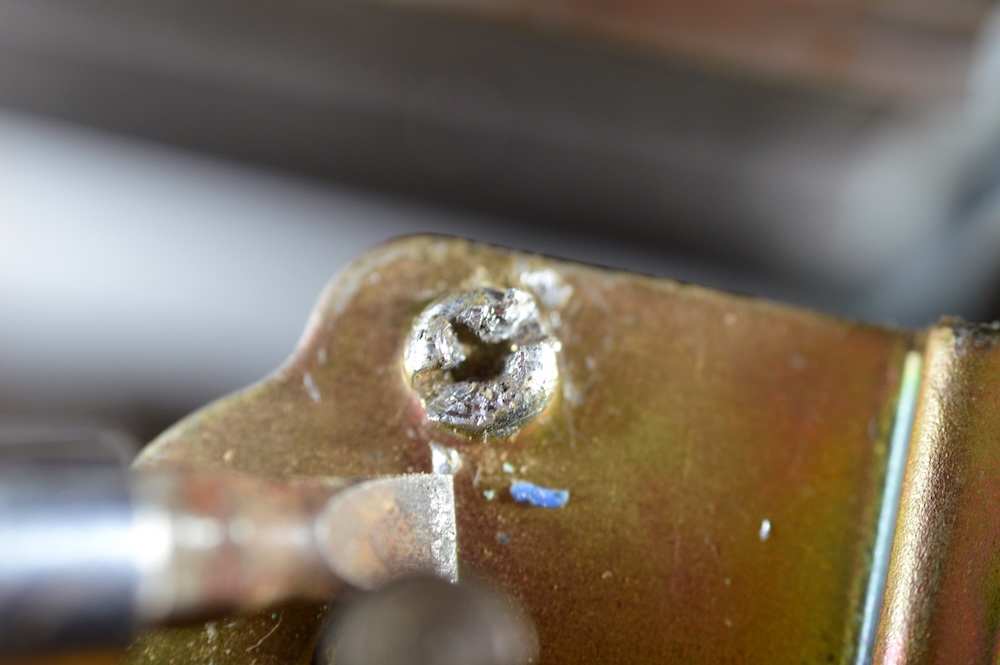
A stripped screw head is characterised by the damage to its driving interface, making it impossible to grip with standard tools. This typically occurs due to the use of worn-out bits, excessive torque application, or misaligned driving. Removing a screw with no head from metal or other materials requires specialised tools or techniques that can grip the outer edges of the damaged head or create a new gripping point.
Snapped Screws
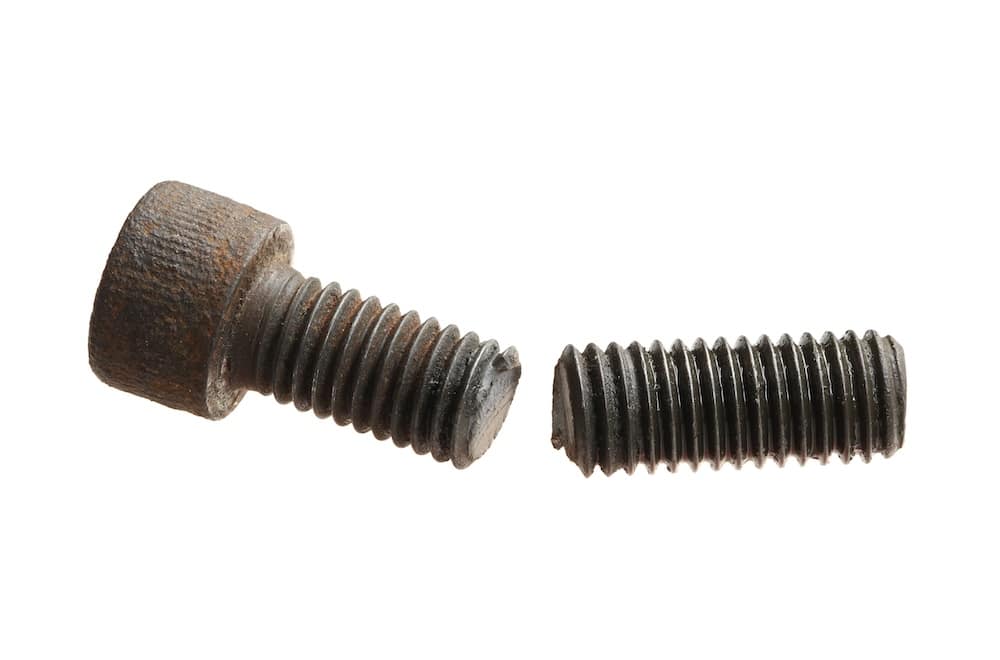
Snapped screws occur when the shank of the screw breaks, often due to excessive force or material fatigue. Techniques for removing a snapped screw depends on whether the break occurred above or below the surface. If the broken section protrudes, it may be possible to grip it with pliers or similar tools. However, if the break is below the surface, more advanced techniques, such as screw extractors or drilling, may be required.
Rusted or Seized Screws
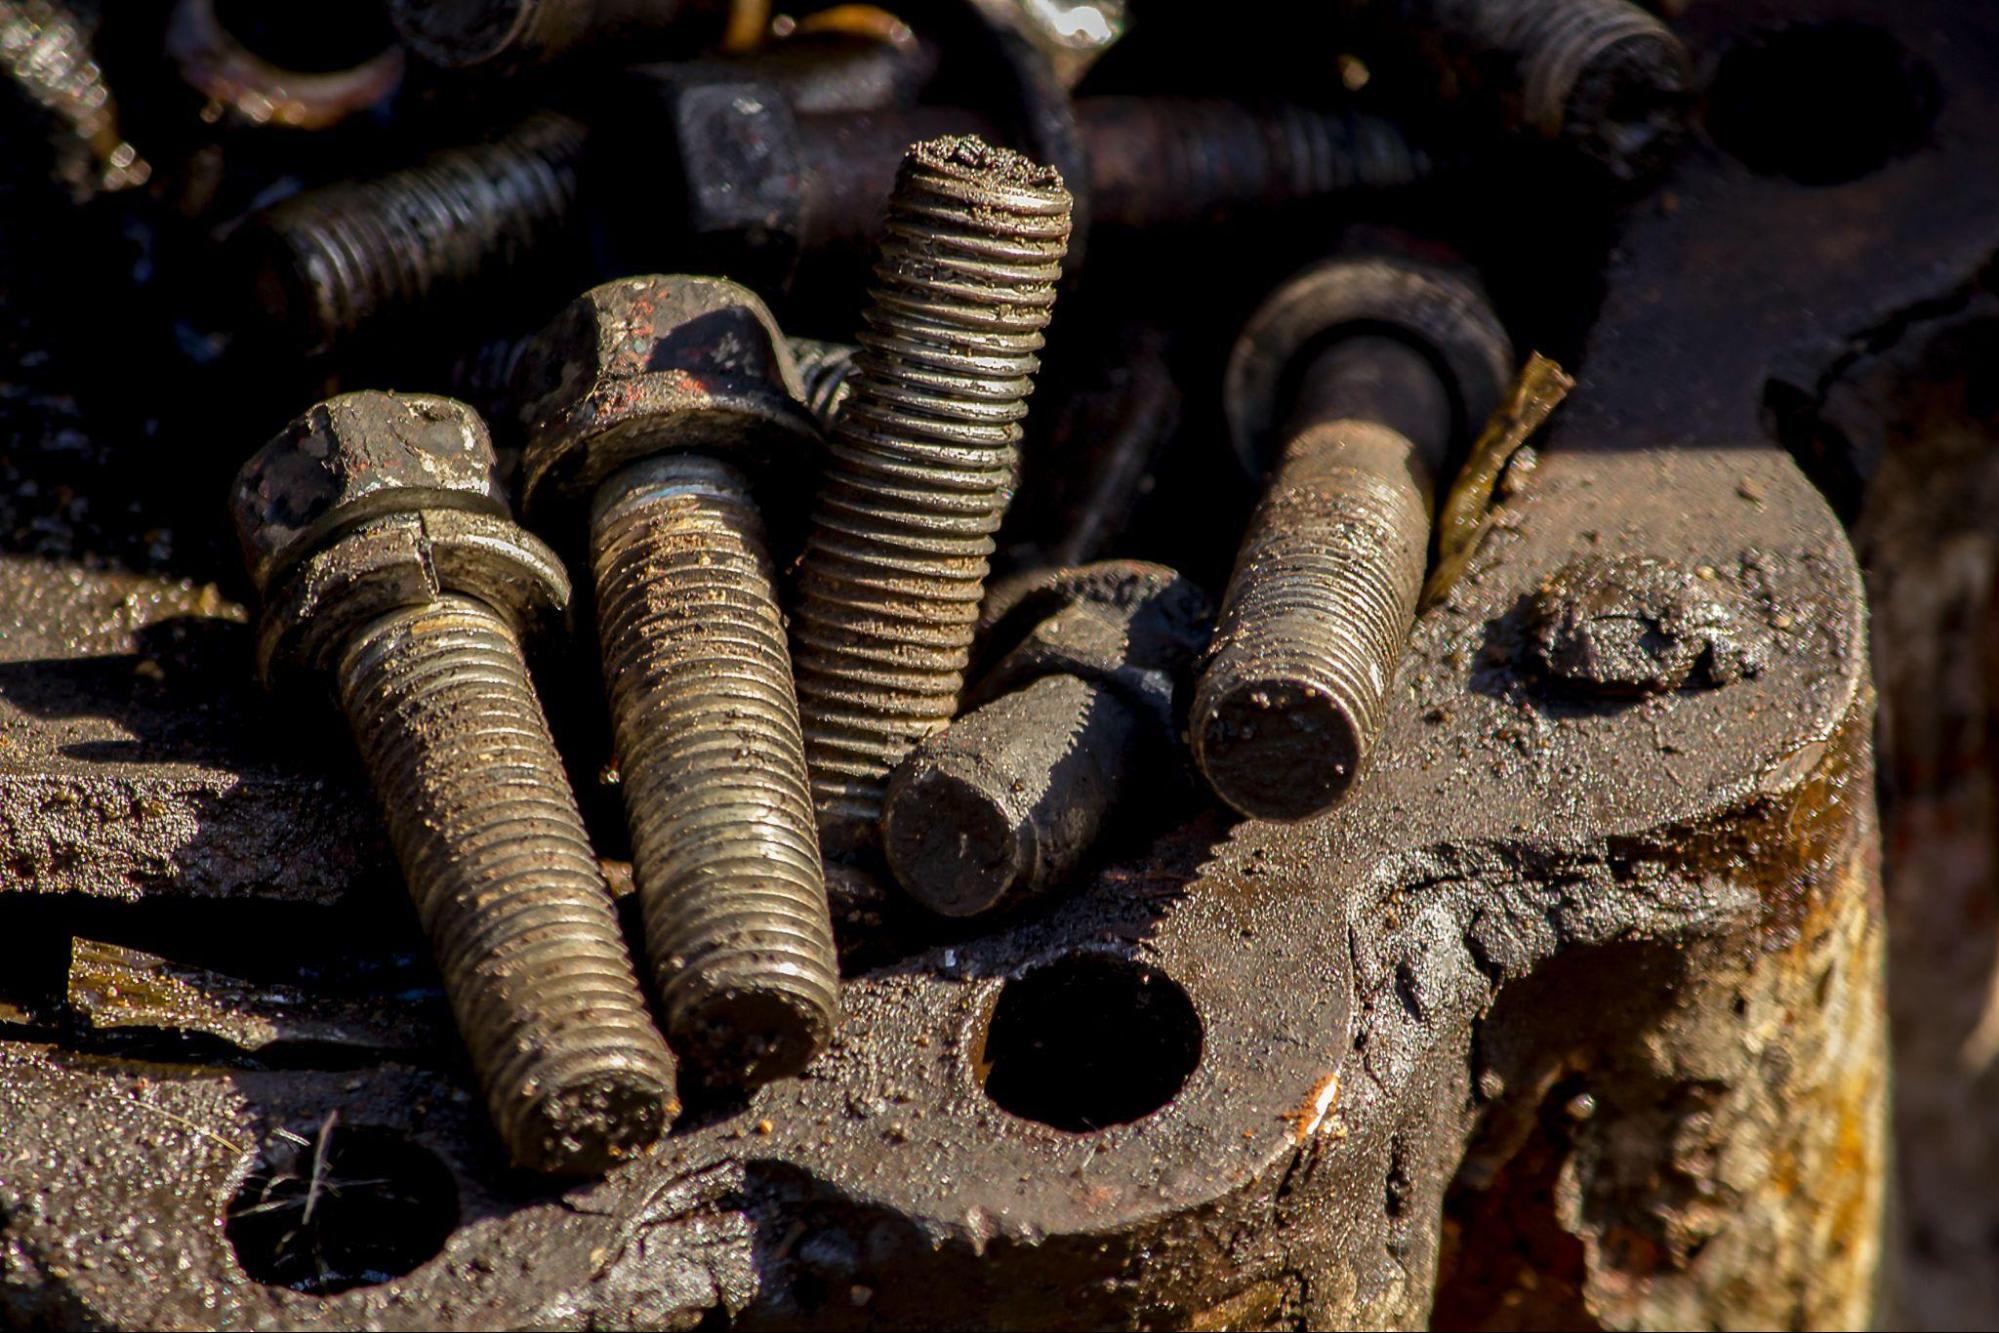
Rusted or seized screws are often encountered in outdoor or humid environments. Oxidation and galvanic corrosion can bind the screw threads, making them extremely difficult to turn. Removal of a broken screw in this condition often involves applying penetrating oil, heat, or a combination of both to break the corrosion bond before attempting removal.
Required Tools and Equipment for Broken Screw Extraction
Removing a screw with no head from metal or other types of materials is a job that typically requires specialised tools and equipment, especially when dealing with challenging situations like snapped or rusted screws. Here are some methods and tools that greatly increase the chances of a successful removal of a broken screw.
Manual Methods
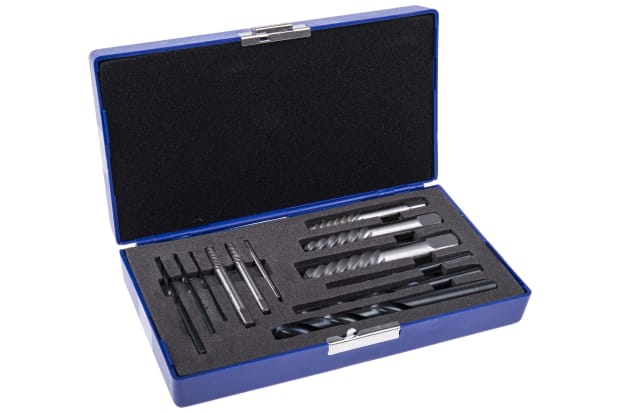
Manual methods and tools are often the first things people will turn to in order to remove a broken screw. Screw extractors, available in both spiral and straight-fluted designs, are essential tools for gripping and turning out broken screw remnants. Pliers or grips can also be used for removing a screw with no head from metal if a portion of the shank is exposed. In some cases, a hammer and centre punch can be used to carefully rotate a broken screw or to create a starting point for drilling.

Power Tool Methods
Power tools can provide the necessary force and precision for more stubborn broken screw cases. A drill equipped with left-hand drill bits can sometimes loosen and extract a broken screw where manual tools fail. Impact drivers with specialised extractor bits can also provide the rotational force needed to remove screws with broken heads. For screws with stripped heads, a rotary tool with a cutting disk can be used to create a new slot for a screwdriver.

Specialty Tools
In situations where screws are severely rusted or seized, specialty tools may be necessary. Applying heat with a torch can cause the screw to expand, breaking the rust bond and making it easier to turn. Electrolytic rust removal, which uses a low-voltage current to dissolve rust, can also be an effective method for removing a screw with no head without a drill when it's heavily corroded.
Step-by-Step Removal Methods for Different Types of Broken Screws
This section provides detailed steps on how to remove a broken screw based on the specific type of damage. Remember to assess the situation carefully and choose the method that best suits the type of broken screw and the material of the workpiece.
Removing Stripped Screws
- Clean the Screw Head: Use a wire brush or a small pick to remove any debris, rust, or burrs from the stripped screw head. This will help improve the grip of any tools you use.
- Enhance Grip: Try to improve the grip between the screwdriver and the stripped head. You can try the following methods:
- Rubber Band: Place a wide rubber band between the screwdriver tip and the screw head. The rubber will fill in the gaps and provide additional friction.
- Steel Wool: Insert a small piece of steel wool into the stripped screw head. This can provide a better grip for the screwdriver.
- Valve Grinding Compound: Apply a small amount of valve grinding compound to the screwdriver tip. This abrasive paste can help the screwdriver bite into the stripped head.
- Use a Different Screwdriver: If using a standard screwdriver, try switching to a different type, such as a Torx or Pozidriv screwdriver, if the screw head allows. Sometimes, a fresh screwdriver with a sharper tip can provide a better grip.
- Specialised Tools: If grip enhancement methods fail, consider using specialised tools:
- Screw Extractor: Select a screw extractor that matches the size and type of the stripped screw. Insert the extractor into the stripped head and carefully turn it counterclockwise to remove the screw.
- Rotary Tool: If there's enough material around the screw head, you can use a rotary tool with a cutting disc to carefully create a new slot for a flathead screwdriver.
- Drill and Re-tap: If all else fails, you may need to drill out the stripped screw.
- Select Drill Bit: Select a drill bit slightly smaller than the screw shank diametre.
- Drill Pilot Hole: Carefully drill a pilot hole into the centre of the stripped screw head.
- Enlarge Hole: Gradually increase the drill bit size and continue drilling until the screw head is removed.
- Re-tap Threads: Use a tap to re-thread the hole to accommodate a new screw.
Extracting Snapped Screws (Above Surface)
- Assess the Break: Examine the broken screw to determine how much of the shank is exposed and the condition of the exposed portion.
- Grip the Shank: If a significant portion of the shank is exposed and in good condition, use appropriate tools to grip it:
- Locking Pliers: Use locking pliers to firmly grasp the exposed shank. Ensure the pliers have a secure grip to avoid slipping.
- Screw Grippers: If the exposed shank is small or difficult to grip with pliers, use specialised screw grippers. These tools have jaws designed to grip small, round objects.
- Vice Grips: In some cases, vice grips can be used to grip the broken shank, especially if it has a flat or irregular surface.
- Apply Heat (If Necessary): If the screw is stuck due to rust, corrosion, or threadlocker, apply heat to the surrounding area using a heat gun or torch. Be cautious not to overheat the workpiece, especially if it's made of a sensitive material. The heat will cause the metal to expand and contract, which can help break the bond between the screw and the material.
- Penetrating Oil: After applying heat (if used), apply a penetrating oil like WD-40 or a specialised rust penetrant to the screw shank. Allow it to soak in for a few minutes to help loosen the screw.
- Controlled Removal: Once you have a good grip, slowly rotate the screw counterclockwise with controlled force. Avoid applying excessive force, which could cause the remaining portion of the screw to break off.
Extracting Snapped Screws (Below Surface)
- Centre Punch: Use a centre punch to create a small indentation in the centre of the broken screw. This will help guide the drill bit.
- Select Drill Bit: Choose a left-hand drill bit that is slightly smaller than the screw shank diametre. Left-hand drill bits are designed to cut in the opposite direction of standard drill bits, which can sometimes help to loosen the screw as you drill.
- Drill a Pilot Hole: Carefully drill a pilot hole into the broken screw using the left-hand drill bit. Apply steady pressure and avoid tilting the drill.
- Use a Screw Extractor:
- Select Extractor: Choose a screw extractor that matches the size of the pilot hole you drilled.
- Insert Extractor: Carefully insert the screw extractor into the pilot hole.
- Apply Pressure: Apply firm pressure to the extractor while turning it counterclockwise. The extractor should bite into the screw and allow you to extract it.
- Drill and Re-tap (If Necessary): If the screw extractor fails to remove the screw, you may need to drill out the entire screw:
- Increase Drill Bit Size: Use progressively larger drill bits to carefully drill out the screw.
- Remove Screw Remnants: Once the screw is drilled out, use a small pick or pliers to remove any remaining fragments.
- Re-tap Threads: Use a tap to re-thread the hole to accommodate a new screw.
Loosening Rusted or Seized Screws
- Clean the Area: Use a wire brush or sandpaper to clean the rusted or seized screw and the surrounding area. This will remove any loose rust or debris and allow the penetrating oil to better reach the threads.
- Penetrating Oil: Apply a generous amount of penetrating oil to the rusted or seized screw and the surrounding area. Allow the oil to soak in for several hours or even overnight. The penetrating oil will work its way into the threads and help to loosen the rust and corrosion.
- Apply Heat: If the penetrating oil alone doesn't loosen the screw, apply heat to the screw and the surrounding area using a heat gun or torch. Be cautious not to overheat the workpiece. The heat will cause the metal to expand and contract, which can help to break the rust bonds.
- Impact Driver: If you have an impact driver, try using it with a properly fitting screwdriver bit to loosen the screw. The impact action can help to break the rust bonds without stripping the screw head.
- Tapping: Gently tap the screw head with a hammer to further loosen the rust and debris. Avoid striking the screw too hard, as this could damage the surrounding material.
- Extraction: Once the screw is loosened, attempt to remove it with an appropriate tool. You can try using a screwdriver, pliers, or a screw extractor, depending on the condition of the screw head.
- Electrolytic Rust Removal: If the screw is severely rusted and other methods fail, consider using electrolytic rust removal. This process involves submerging the rusted screw in an electrolyte solution and passing a low-voltage current through it to dissolve the rust.
Preventing Broken Screws in the Future
While it’s good to know how to remove a broken screw, preventing them in the first place is always preferable. Here are some key tips to minimise the risk of screw breakage:
- Use Proper Torque Settings: Ensure you apply the correct amount of torque for the specific screw size and material. Refer to torque charts or manufacturer's specifications for guidance.
- Be Liberal with Lubrication and Anti-Seize Compounds: Reduce friction and prevent seizing by applying a lubricant or anti-seize compound to the screw threads before installation. This is particularly important for screws that will be exposed to moisture or high temperatures.
- Ensure Correct Drill Bit Sizes and Use Pre-Drilling: When fastening into hard materials, pre-drilling a pilot hole is crucial. Use the correct drill bit size for the screw you're using to avoid applying excessive pressure during installation.
- Choose High-Quality Screws: Invest in high-quality screws made from durable materials that are appropriate for the intended application. Cheap or low-quality screws are more prone to breakage, especially under stress.
Shop Industrial-Grade Screws and Bolts at RS Australia

Need reliable, high-quality screws and bolts for your next project? Look no further than RS Australia! We offer a wide selection of industrial-grade fasteners designed to meet the demands of professional applications. Shop now and experience the difference that quality fasteners can make in your work.
Final Notes of Removing Broken Screws
Successfully removing a broken screw requires a combination of careful assessment, appropriate tools, and proper technique. Remember to always diagnose the type of screw breakage before selecting a removal method. Utilise grip-enhancing techniques, specialised tools, and, if necessary, power tools or heat application to extract broken screws effectively.
However, there are instances where professional assistance is recommended. If you're dealing with a particularly challenging broken screw, working with delicate or valuable materials, or lack the necessary tools or expertise, it's best to consult a professional machine shop. They have the specialised equipment and experience to handle complex extractions and minimise the risk of damage to your workpiece.
For professionals in Australia seeking high-quality tools and equipment for broken screw removal or other workshop tasks, RS Australia offers a wide selection of products such as cable and crimping tools, grease guns, complete tool chests and cabinets, and many more.