- Published 7 May 2025
- Last Modified 7 May 2025
- 11 min
How to Drill Into a Brick Wall Without Cracking It
This article covers everything from choosing the right drill bit to techniques for drilling into the different types of brick and mortar.

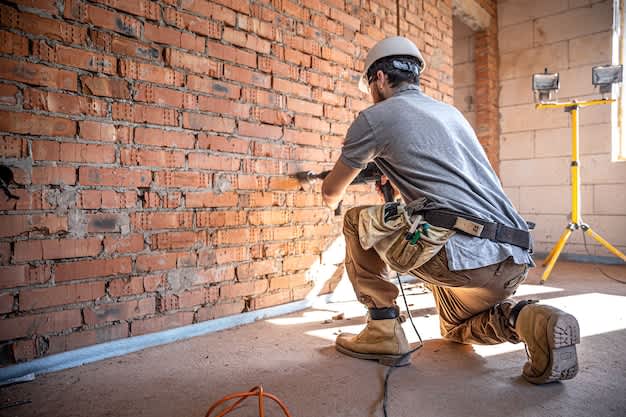
Drilling into brick can be a daunting task, especially for those unfamiliar with the process. Unlike drilling into softer materials like wood or drywall, brick presents unique challenges due to its hardness and brittleness. However, with the right tools, techniques, and a bit of patience, you can successfully drill into a brick wall without causing any damage. This guide will provide a comprehensive overview of the process, from selecting the appropriate tools to mastering the drilling techniques to prevent cracking and how to troubleshoot common issues.
Tools Required
Using the right tools is crucial for successful drilling into brick. Selecting the appropriate drill, drill bits, and other accessories can make the difference between a clean, precise hole and a cracked or damaged brick. Here’s a quick breakdown:
Types of Drills
Choosing the right type of drill depends on the size and scope of your project, the hardness of the brick, and your personal preferences for power and portability. Here are the drills commonly used:
- Hammer Drills: Hammer drills combine rotary motion with a hammering action, providing the necessary force to penetrate hard materials like brick and concrete. They’re a versatile option for most DIY and professional drilling tasks.
- Rotary Hammer Drills (SDS Drills): Rotary hammer drills, also known as SDS drills, offer a more powerful hammering action compared to standard hammer drills. They’re ideal for heavy-duty drilling in concrete, brick, and stone.
- Corded Drills: Corded drills offer consistent power and are suitable for extended use without worrying about battery life. They’re a good choice for larger projects or when access to power outlets is not an issue.
- Cordless Drills: Cordless drills provide portability and convenience, making them ideal for smaller tasks or when working in locations without easy access to power outlets. However, their battery life can be a limiting factor for extended use.
Types of Drill Bits and Sizes
Choosing the right drill bit is crucial for achieving clean and accurate holes in various materials. Here's a guide to some common types of drill bits and their applications:
- Masonry Bits: Masonry bits are specifically designed for drilling into hard, brittle materials like brick, concrete, and stone. They feature a carbide tip that can withstand the high temperatures and forces involved in drilling through these materials. The carbide tip also helps to prevent the bit from dulling or breaking, ensuring efficient and long-lasting performance.
- Twist Drill Bits: Twist drill bits are versatile bits commonly used for drilling into wood, metal, and plastic. However, they’re not suitable for brick or masonry due to the difference in material hardness. Using twist drill bits on brick can damage the bit and the material, leading to inefficient drilling and potential safety hazards.
- Tile Bits: Tile bits are specifically designed for drilling into ceramic tiles, porcelain, and other brittle materials. They typically feature a diamond or carbide tip that can create clean holes without cracking or chipping the tile. The specialised tip design helps to prevent the bit from wandering or slipping on the smooth surface of the tile.
- Hole Saws: Hole saws are used to create larger holes in various materials, including brick, wood, and metal. They consist of a cylindrical saw blade with teeth around the circumference and a pilot bit in the centre to guide the cutting process. Hole saws are ideal for creating holes for pipes, electrical outlets, and other installations that require larger openings.
- Spade Bits: Spade bits, also known as paddle bits, are flat, paddle-shaped bits primarily used for drilling large holes in wood. They’re not suitable for brick or masonry due to their design and cutting mechanism. Spade bits are commonly used in carpentry and woodworking applications where large, shallow holes are required.
- Auger Bits: Auger bits are long, spiral-shaped bits designed for drilling deep holes in wood. They’re commonly used in construction and carpentry for drilling holes for pipes, wires, or other installations that require deep penetration into wood. Unfortunately, they’re not suitable for brick or masonry due to their length and cutting action.
Other Essential Tools
Besides the drill and drill bits, several other tools are essential for drilling into brick safely and effectively:
- Tape Measure: For accurately measuring and marking the drilling location.
- Pencil or Marker: To mark the drilling spot on the brick.
- Level: To ensure the drill is held straight and the hole is drilled vertically.
- Hammer: For tapping in wall anchors if needed.
- Vacuum Cleaner: To control dust and debris during drilling.
- Safety Gear: Eye and face protection, ear defenders, and work gloves to ensure safety during the drilling process.
Preparation Tips for Drilling Through Brick
Proper preparation is essential for successful drilling into brick. Taking the time to choose the right location, mark the spot accurately, and prepare the surface can prevent cracking and ensure a clean and precise hole.
Here are a few tips:
- Choosing the Location: Consider aesthetics, structural support, and potential obstructions when choosing the drilling location. Avoid drilling into mortar joints if possible, as they’re weaker than the brick itself. Use a stud finder or other methods to check for hidden wires or pipes before drilling.
- Marking the Spot: Use a pencil or marker and a level to mark the exact drilling location. Ensure the mark is clearly visible and accurately positioned.
- Starting the Hole (Optional): For extremely hard bricks, creating a pilot hole with a smaller masonry bit or a nail and hammer can help guide the drill bit and prevent it from wandering or slipping.
Guide to Drilling a Hole
Once you have prepared the surface, it's time to start drilling. Here's a step-by-step guide:
- Identify the Type of Wall You’re Drilling Into: Before you begin drilling, it's crucial to determine the type of wall you're working with. Is it a solid brick wall, a cavity wall, or a brick veneer wall? This information will help you choose the right tools and techniques for the job.
- Check for Wires and Pipes: Drilling into a wall without knowing what's behind it can be dangerous. Always use a stud finder or other appropriate tools to locate any hidden wires or pipes before you start drilling. Accidentally drilling into a live wire or water pipe can cause serious injury, electrical shock, or water damage. Taking the time to check for hidden obstacles can prevent costly repairs and ensure your safety.
- Mark the Drilling Point: Accurate marking is essential for drilling a precise hole in the desired location. Use a pencil or marker to clearly mark the spot where you want to drill. If necessary, use a level to ensure the mark is horizontal or vertical, depending on your needs. This will help you guide the drill bit accurately and prevent it from wandering or slipping, especially on hard surfaces like brick.
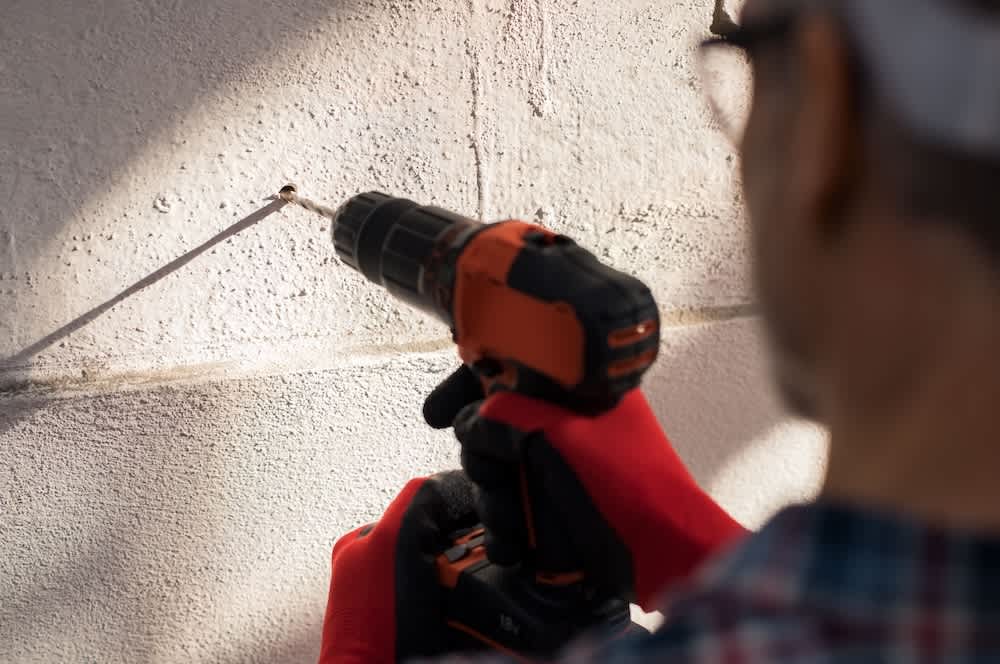
- Drill the Wall: Use a low-speed setting on your drill and apply moderate pressure. Avoid excessive force, which can cause the brick to crack. Make sure to use a level to guide the drill and ensure it remains perpendicular to the brick surface. Avoid tilting the drill, which can lead to an uneven or oversized hole. If the drill bit gets hot, dip it in water to cool it down and prevent overheating. Overheating can damage the bit and reduce its lifespan.
- Clear the Dust: Periodically stop drilling and remove dust and debris from the hole using a vacuum cleaner or brush. This prevents the dust from clogging the drill bit and ensures efficient drilling.
- Install Anchor (If Needed): Once the hole is drilled, insert a wall anchor if necessary to provide additional support for the screw.
- Drill a Screw: If an anchor isn’t needed, drill a screw directly into the hole to secure your fixture or object.
Guide to Drilling into Mortar
Drilling into mortar requires a slightly different approach due to its softer and more brittle nature compared to brick.
- Choose the Right Bit: Use a masonry bit designed for drilling into softer materials like mortar.
- Lower Speed and Pressure: Use a lower speed setting on your drill and apply gentle pressure to avoid cracking the mortar.
- Start Slowly: Begin drilling at a slow speed and gradually increase the speed as the bit penetrates the mortar.
- Clear Dust: Regularly remove dust and debris from the hole to prevent clogging and ensure efficient drilling.
- Avoid Excessive Depth: Be careful not to drill too deep into the mortar, as this can weaken the joint and compromise the structural integrity of the wall.
How to Prevent Brick Cracking
- Drill at Least an Inch from the Edge: Avoid drilling too close to the edge of the brick, as this can increase the risk of cracking. Aim for at least an inch from the edge to provide sufficient support.
- Apply Steady Pressure: Use consistent and moderate pressure while drilling. Avoid excessive force or sudden changes in pressure, which can cause the brick to crack.
- Start with a Smaller Pilot Hole: For hard bricks, starting with a smaller pilot hole can help guide the drill bit and reduce stress on the brick.
- Use Sharp, High-Quality Drill Bits: Ensure your drill bits are sharp and in good condition. Dull or damaged bits can generate excessive heat and increase the risk of cracking.
Types of Common Anchors
Wall anchors are indispensable for ensuring a secure and lasting hold when attaching objects to brick or masonry surfaces. These small components provide the necessary support and stability for screws, preventing them from loosening or pulling out under stress. The selection of an appropriate anchor hinges on several factors, including the weight of the object being mounted, the type of brick or masonry, and the size of the hole.
Here's a breakdown of common anchor types and their applications:
- Plastic Expansion Anchors: These anchors expand when a screw is inserted, providing a secure grip on the brick. They’re suitable for lighter loads and are commonly used for hanging pictures, shelves, or light fixtures.
- Metal Expansion Anchors (Sleeve Anchors): These anchors are similar to plastic expansion anchors but are made of metal for greater strength and durability. They’re a robust choice for heavier loads and are often employed for securing heavier objects or fixtures.
- Wedge Anchors: For heavy-duty applications, wedge anchors are a go-to solution. These anchors are driven into a predrilled hole and expand as the screw is tightened, creating a powerful grip on the masonry. Their high load-bearing capacity makes them ideal for construction and industrial applications.
- Screw Anchors: Screw anchors are threaded anchors that are screwed directly into the brick or masonry. They’re suitable for lighter loads and offer a convenient solution for securing lightweight fixtures or objects.
- Tapcon Screws: Tapcon screws are self-tapping screws designed for concrete and masonry. Their unique thread design enables them to tap their own threads into the material, creating a strong and secure hold without the need for a separate anchor.
- Self-Drilling Drywall Anchors: While primarily designed for drywall, these versatile anchors can also be used in softer bricks or masonry. Their drill bit tip allows them to drill their own hole, after which they expand to provide a secure grip.
- Specialty Anchors:
- Hollow Wall Anchors: These anchors cater specifically to hollow walls, such as those made of drywall or plasterboard, providing a secure hold on these otherwise challenging surfaces.
- Drop-In Anchors: Drop-in anchors are designed for anchoring objects to concrete floors. They are inserted into a predrilled hole and then expanded using a setting tool, creating a strong and reliable connection.
- Chemical Anchors: Chemical anchors offer a high-strength solution for demanding applications. They involve injecting a resin into a predrilled hole, which then hardens to create a strong bond with the anchor and the surrounding material. This method is often used for structural applications and heavy-duty installations.
How to Choose the Right Anchors
Selecting the appropriate anchor for your application depends on several factors, including:
- Weight of the Object: Choose an anchor with a weight capacity that matches or exceeds the weight of the object you are securing.
- Base Material: The type of brick or masonry will influence the choice of anchor. Some anchors are designed for solid brick, while others are suitable for hollow or softer bricks.
- Application: Consider the specific application and the type of load being applied. Different anchors are designed for different types of loads, and the wrong anchor may
- Hole Size: Ensure that the anchor you choose is compatible with the size of the hole you have drilled.
Troubleshooting Common Issues Drilling Into Brick
Cracked Brick
Cracked bricks are often a frustrating consequence of improper drilling techniques. One way to avoid this mishap is to maintain steady pressure while drilling, keep a safe distance from the edges of the brick, and ensure your drill bits are sharp and in good condition. Should a minor crack occur despite your best efforts, it can often be salvaged using epoxy or other suitable fillers.
Difficult Drilling
Hard bricks or hitting metal can make drilling difficult. For hard bricks, consider using a more powerful drill or starting with a smaller pilot hole to reduce stress on the brick. If you hit metal, stop drilling immediately and investigate. It could be a wire or pipe, and continuing to drill could cause serious damage or injury.
Other Issues
In addition to cracking and difficult drilling, other issues can arise during the drilling process. For instance, drill bit binding can occur when dust and debris accumulate in the hole, hindering the bit's progress. To prevent this, it's advisable to periodically clear the dust from the hole and consider using a lubricant, such as water, to cool the bit and reduce friction.
Another common issue is drill wandering, where the bit deviates from its intended path, especially on hard surfaces like brick. This can be mitigated by using a drill guide or starting with a pilot hole to provide a clear path for the bit.
Mastering Brick Drilling: Achieving Precise and Secure Results
Drilling into brick might seem like a daunting task, but armed with the right knowledge and tools, it can become a manageable and even satisfying endeavour. The key lies in understanding the unique characteristics of bricks and how they interact with the drilling process. With practice, patience, and attention to detail, you can confidently conquer any brick drilling project, from hanging a picture frame on the wall to complex mansory installations like securing heavy-duty fixtures.


